Eğitim
Don’t Forget to Adjust These Settings Before Printing in Excel!
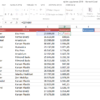
Before printing a document in Microsoft Excel, we often need to adjust the column widths to ensure that the data fits properly on the page.
Welcome to Our Excel Training!
Before printing a document in Microsoft Excel, we often need to adjust the column widths to ensure that the data fits properly on the page.
When we switch to the Page Layout View, we might notice that some rows or columns do not fit within the printable area. In such cases, Excel offers a useful feature to make adjustments easily.
To fix this, simply click on the “Show Margins” button in the lower right corner of the screen. Once the margin guides appear, you can manually adjust the column widths as needed. This allows you to optimize the layout before printing or saving the document as a PDF.
For example, if you notice that a row is being cut off, you can slightly adjust the page margins by dragging the top and bottom guides until everything fits properly.
Ensuring Titles Appear on Every Page
Another important aspect of printing in Excel is ensuring that column headers appear on every printed page. By default, the headers only appear on the first page, but we can change this:
- Go to the Page Layout tab.
- Click on “Print Titles” in the Page Setup group.
- In the window that appears, locate the “Rows to repeat at top” option.
- Click on the row containing your column headers to select it.
- Click OK to apply the setting.
Now, when you preview the document, you will see that the column headers are repeated on every page, making the data easier to read.
Additional Formatting Options
If you want to enhance the visibility of your headers, you can:
- Select the header row and apply a background color using the Cell Styles in the Home tab.
- Adjust font size or style to improve readability.
Printing or Saving as a PDF
Before finalizing your document, you can use the Show Margins option in Print Preview to fine-tune your layout. If you need to save the document as a PDF, follow these steps:
- Click on File > Print.
- In the Printer section, select “Microsoft Print to PDF”.
- Click Print, then choose a name and location to save the file.
By following these steps, you can ensure that your Excel documents are well-structured, easy to read, and properly formatted before printing or sharing as PDFs.